
Light painting photography is not just capturing a moment in time; it’s about adding a dash of magic to the frame. While many regard this as a complicated photographic technique, it’s actually quite accessible. All you need are some basic camera settings, a little patience, and a zest for creativity. Let’s delve into the world of light painting.

On September 18, 2023, professional Lake George and Adirondacks photographer Jim McLaughlin taught a class on Light Painting to members of the Capital Champlain Professional Photographers of New York at Moscatiello’s Restaurant.
Here are a few tips for getting started with light painting that apply to product and real estate photography, as well as landscapes.
Light Painting Tips
Equipment Checklist
- A DSLR or mirrorless camera with manual mode.
- A tripod.
- A remote shutter or timer.
- LED light sources (torches, wands, or even your phone).
- A lens with manual focus capability.
- A Neutral Density filter to cut down on glare when photographing reflective surfaces.
Prepping the Camera Settings
ISO Settings
Before you start painting with light, you need to understand your camera’s ISO settings. For light painting photography, a low ISO like ISO 100 is recommended. A lower ISO minimizes noise, giving you a cleaner image.
Shutter Speed & Exposure Time
Since light painting is a long exposure photograph technique, your shutter speed plays a crucial role. Generally, a slow shutter speed of about 10-30 seconds is a good starting point. You might need to adjust based on your test shots, but this exposure time should give you enough room to move your lights around.
For longer exposures, you may need to familiarize yourself with your camera’s Bulb mode. An intervalometer can be invaluable here.
Manual Focus
Auto-focus will struggle in low-light conditions. Therefore, using manual focus is critical. Focus on the object or area where you plan to paint and lock the focus.
Ambient Light
Ensure your scene has as little ambient light as possible. This will make your light painting photograph stand out. If you’re shooting outdoors, choose a time and place with minimal light pollution.
Watch out for light from cellphones or even cameras themselves. For a low-tech solution, use a small piece of black electrical tape to cover unwanted light, such as the red infrared lamp on some cameras.
The Process of Light Painting
Stabilize the Camera
Stability is paramount in light painting. Any unintended movement can spoil the effects you’re
trying to create. Here’s how to keep your camera as steady as a rock:
- Tripod: Always use a tripod to secure your camera. Opt for one that’s sturdy enough to
hold your camera’s weight without wobbling. Consider adding a sand bag for greater stability. - Cable Release or Timer: Use a cable release or the camera’s in-built timer to prevent
physical contact with the camera during the shot. - Wind and Weather: Be cautious of outdoor conditions. Strong winds could potentially
destabilize your setup. - Physical Barriers: If possible, use physical barriers like windshields to minimize the
impact of environmental factors.
Take a Test Shot
Before you begin your light painting session, take a few test shots to ensure everything is set up correctly. Check if the scene is too dark or too light and adjust your settings accordingly.
Starting the Painting
Once your camera is ready, hit the shutter button or timer and start moving your LED light source. Remember, the camera will capture all light sources, so move carefully.
Don’t be afraid to move through the image. You’re unlikely to appear in the resulting image, especially if you’re dressed in black.
Finish In Photoshop
After capturing your light-painted images, Adobe Photoshop (or similar image editing software)
can be a valuable tool to refine and even enhance your work. Layering techniques allow you to
blend multiple shots, correct imperfections, or amplify certain effects.
Types of Light Painting
Light Drawing
In light drawing, you literally draw shapes or write words using your light source. Simple, yet effective, this is a great starting point for beginners.
Kinetic Light Painting
In kinetic light painting, you move the camera instead of the light source, creating intricate patterns. This might require more advanced control over your camera and light sources.
Tips for Light Painters
- The more you practice, the better your understanding of how light interacts with your camera.
- Use various colors and types of LED lights for added complexity.
- Consider collaborating with other light painters for dynamic compositions.
What Type of Client Work Looks Good Painted with Light?
While light painting is often associated with experimental or fine art photography, it also has
commercial applications that can make client work stand out in unique ways. Some sectors
where light painting can be particularly effective include:
- Automotive Industry: Light painting can emphasize the curves and edges of a car,
making it look more dynamic and luxurious. - Fashion Photography: The technique can be used to create ethereal or dramatic effects
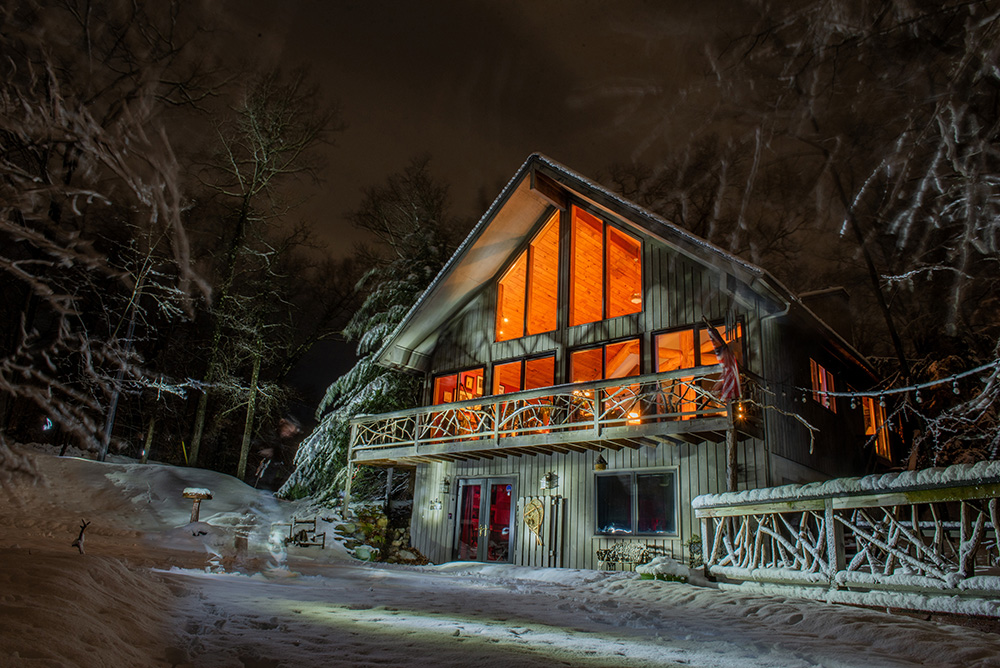
that emphasize the clothing and the model. - Real Estate: Creative light painting can make property photos stand out from the norm,
giving a futuristic or artistic aura to an otherwise standard setting. - Product Photography: Light painting can bring an extra flair to high-end products like
watches jewelry, or tech gadgets, creating a sense of movement or luxury around them.
Conclusion
Light painting photography is an exciting way to explore your creative limits. With manual mode, you have the flexibility to control ISO, shutter speed, and manual focus, enabling you to experiment and produce awe-inspiring photographs. So, grab your gear and venture into the captivating world of moving lights and long-exposure photography.